| News |
| Documentation |
| Downloads |
| Contact Info |
| Project Page |
Using Resize-O-Matic - A four steps tutorial
Resizing - Step #1
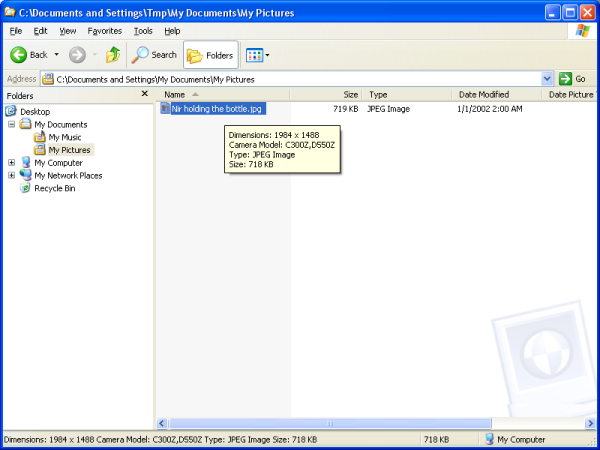
Open Windows Explorer and navigate to a directory which holds your image files. In this tutorial, we choose only one image file, but the same apply to scaling multiple files at once (pressing the Ctrl key while clicking on file name allows selection of multiple files). The original file is an image with dimensions of 1984 pixels width and 1488 pixels height. The file size is about 719 KB, which is quite large for attaching it to an e-mail message or uploading it to a public forum. For example, Tapuz Forums (An Israeli web site with Hebrew forums, no point of going there if you can't read Hebrew ;-) ) have a 250 KB limit on attached files.

Resizing - Step #2
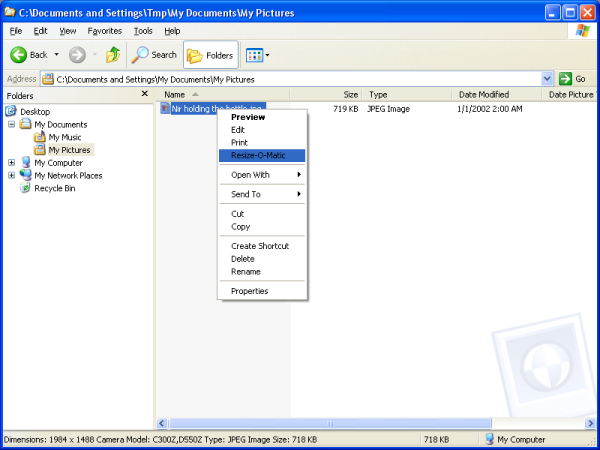
Right-Click on the image file and select the "Resize-O-Matic" menu item.

Resizing - Step #3
Select a new image size and click the OK buttom.

Resizing - Step #4
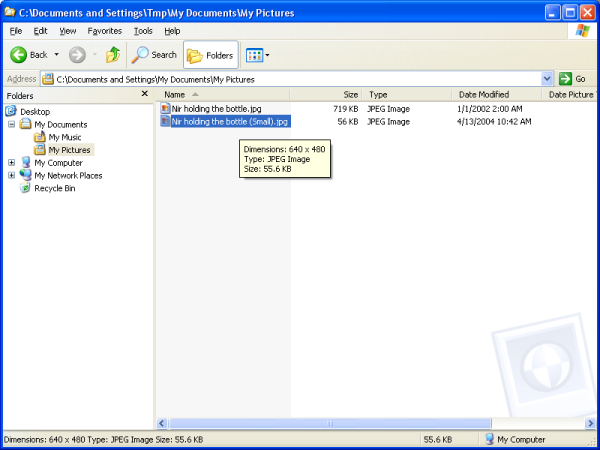
A new image file was created. Note the dimensions of the new image. It is now 640 pixels width and 480 pixels height. The new file size is only 56 KB, while still preserving the original image quality as much as possible!
